I thought I’d do a little hair tutorial today.
The Page Boy was a popular style in the 1940s. It’s a smooth hair style rather than a really curly or wavy one, with curls at the bottom the hair tucked under.
I think of this as one of my “lazy” hair dos. When I wash my hair if I can’t be bothered to put rollers in properly then this is the style I go for. I don’t think it’s really possible to get the look if you don’t have a middy cut or something similar, as it’s that curving line in the hair that makes this style so striking.
The method I use just happens to be one that works for me, I think there are lots of other tutorials out there that probably do it differently!
You will need:
- Bobby pins / kirby grips / pin curl clips
- A comb
- Setting lotion – I use Stayset which you can buy in Boots and Superdrug, it’s usually with the perm lotions.
- A hair brush
The reason this is my lazy hair do is because I use large chunky handfuls of hair to stop it getting too curly, and it therefore needs less curls.
After washing your hair, while it is still damp, part it as you would normally wear it, for me this is on the side. Then take large chunks of hair, pull it out at a 90 degree angle from your head, spritz lightly with setting lotion (I use a small spray bottle) and roll into large chunky stand up pin curls, including a large diagonal section at your fringe. Secure each curl to your head using a grip at the base of the curl. I use kirby grips as I find them more comfortable to sleep on than pin curls clips.
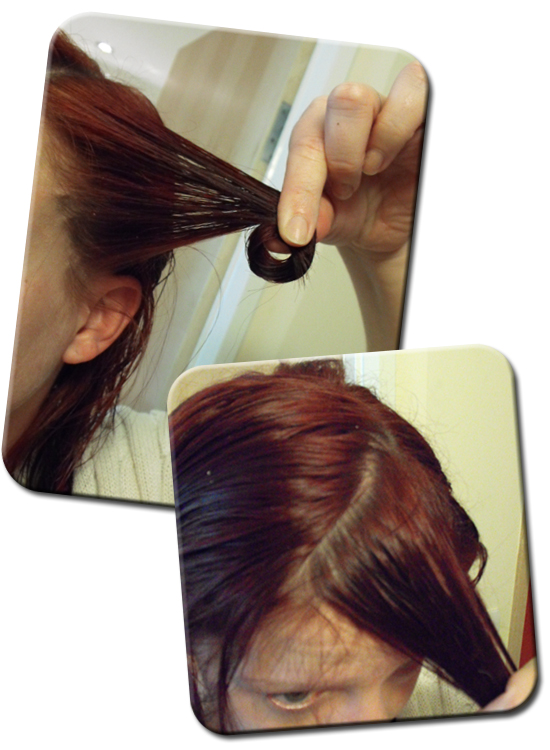 Some people roll pin curls around their finger, or a mascara tube. At the front I find it easiest just to tuck the ends under and start curling. At the back I find holding the ends between 2 fingers and rolling helps. I also shut my eyes!
For this style I normally end up with 2 rows of 3 curls at the back of my head and 2 curls on the side with least hair. The side with the most hair after the parting I have one forward facing roll for my fringe, 2 on the top of my head and then one just above my ear. Sounds complicated but it isn’t really.
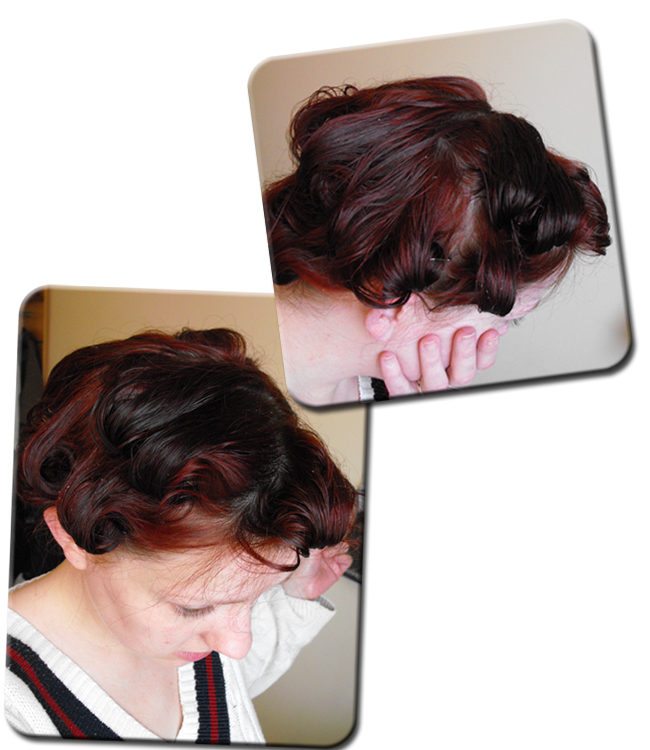
Cue terrifying photos of me with no make up on
This only takes me 5 or 10 minutes to do. You’ll see it doesn’t look particularly pretty or tidy, but it doesn’t need to, yet….
Next I just pop on a hair net and go to bed.
Night!
Next day, I take out the curls. It doesn’t look very auspicious to start with, but a bit of brushing and the transformation occurs. This actually isn’t my best ever version, I rolled a little too tightly on the side with most hair and it was a bit wavier than I’d really like.
 Basically the key is just to keep brushing the hair smooth, turning the ends under by brushing it over your hand while you brush the top, and rotating the brush as you brush the underside.
I normally use a bit of serum for shine, and if it’s taking too long to brush smooth I find directing a hair dryer down the hair while brushing can help. I know some people use hot brushes and things too but I find them a pain.
I sometimes use a little bit of back combing on the fringe and at the side, just to add a bit of shape. But otherwise that’s all there is to it!


